Monday, June 26, 2017

Why the Bloor Bike Lane should stay


As a recently repatriated Torontonian, I have lots to learn about this ever changing city.

One thing that I love to do is explore places on two wheels. Faster than walking, cheaper than driving, more exercise than TTC. I bike as much as I can during the summer months.

One thing I know about cycling in Toronto is that it's not a matter of if you get hit by a car but when you get hit by a car.

So I was understandably a little nervous about hitting the roads of Toronto on by bike; what with danger lurking around every corner, in every streetcar track, and beside every parked car.

Luckily, I take bike lanes for the majority of my ride to and from work. I take the Bloor bike lane and the Shaw bike route.

Here is a comprehensive (but not exhaustive) list of why the Bloor bike lane is awesome:

  1. Direct line to work on a convenient artery of the city
  2. Exercise  (work off the winter weight)
  3. Window shop local businesses (love a great deal)
  4. Learn about the neighbourhoods (and the people that live there)
  5. See what's happening in Christy Pitts (so far: baseball, protests, newscasts, festivals)
  6. Decide where I will order takeout from based on which restaurant smells best
  7. Be part of a biker gang (that knowing nod you give other cyclists when you make eye contact)
  8. Start seeing familiar faces on bike route (Toronto love)
  9. Appreciate good weather
  10. Get to wear expensive rain pants and rain jacket on rainy days
  11. Inspire drivers to ride their bikes (optimistic, I know)
  12. Easy to go out shopping along Bloor (quick errands are more feasible)
  13. Feel safer biking in this city 
  14. Inspired to see more of this city
  15. Interested in advocating for more bike lanes in this city
I read today that 'millennials' like myself are more likely to support the Bloor bike lane, but 'boomers' are more likely to dislike the bike lane (http://www.cbc.ca/news/canada/toronto/new-bike-lane-poll ) which I find unsuprising, because they are probably the ones in cars that speed by me during my commute. 

I hope that this ever-changing city continues to keep its sights on the future and opts to keep the bike lane. 

Signed, 

Bike Lane User Canadianlstan


Thursday, April 17, 2014

I'm Back!!

Travels to commence April 17, leaving Canada and going to Australia!! More to come -

Sunday, July 29, 2012

Lewa Wildlife Conservancy: An Introduction

The first place we stayed was at Lewa Wildlife Conservancy. The fact that I was traveling with someone who used to work here was quite fortunate; I got the benefit of enjoying it as a tourist, as well as having someone who knew the place inside and out! He could rattle off statistics about Lewa for me, and ensured that I was well informed before I arrived. I'll do my best to provide a synopsis about Lewa (with some help from my friend Wikipedia!).

Lewa Wildlife Conservancy is located in northern Kenya. Formed from a former Cattle ranch in 1995, it covers over 62,000 acres (250 km2).

The Conservancy is home to a wide variety of wildlife including the rare and endangered black rhino,Grevy's zebra, and marshbuck. It also includes the big five (lion, leopard, elephant, rhino, and African buffalo). Lewa holds over 12% of Kenya’s black rhino population and the largest single population of Grevy’s zebras in the world (approximately 350 individuals).

The Conservancy is also home to the Northern Rangelands Trust, an innovative partnership with a number of communities to the north who have given their land for the preservation of wildlife. Lewa has its own education program that helps develop schools and students.

The forces behind this organization have been instrumental in developing highly effective conservation efforts throughout Kenya. If you're interested in learning more about Lewa Wildlife Conservancy or Northern Rangelands Trust (NRT), please visit any of the links below.

http://www.lewa.org/
http://en.wikipedia.org/wiki/Lewa_Wildlife_Conservancy
http://www.nrt-kenya.org/

Aero Club of East Africa

After a quick 7 hours to Amsterdam and 8 hours to Nairobi I arrived late at night into Jomo Kenyatta International Airport, Nairobi, Kenya. A driver took me to my accommodation for the night, Aero Club of East Africa, located in Wilson Airport.

Safe, clean, nearby, and inexpensive, this hotel/motel was recommended as a place to stay for the very short term. Wilson Airport generally serves domestic flights throughout Kenya, so staying there can ensure that you mingle with pilots, local travellers, and light airplane enthusiasts. Ryan was arriving the next morning and we were immediately going up north, so I didn't need anything too fancy for the night.

The room costs me around CAD$70 for the night, and the food in the bar was simple and affordable.

http://www.aeroclubea.com/
Bar/Restaurant area


A single room for the night

Adventures in Kenya

I am thrilled to be able to go on another adventure! This time, I'll be with my man friend (Ryan) in Kenya. Over the course of just less than a month, we hope to explore as much of the country as possible and see what it has to offer. From safari to city to deep sea fishing, I'll be able to write about what to do, what to see, and how to get there.

Here is a very professionally drawn tentative map of where we plan to go.

Let the adventure begin!

Our Itinerary through Kenya


Sunday, April 29, 2012

Ubud Guest House Recommendation: Keprabon Guest House

When we arrived late afternoon in Ubud, Indonesia out of the taxi coming straight from the airport, we didn't know what to expect. We didn't have any hostels booked, and we didn't even know where to tell the taxi driver to let us out. As we passed monkey forest, we started to see tourists and decided to get out. The taxi driver didn't speak English and was trying to tell us something. We figured out later he was trying to tell us we were NOT at the centre of town yet, and we should have kept going. Ahh well, a little walking never hurt anyone.

What we woke up to each morning!
As we made our way into central Ubud, we began to inquire with hostels along the main drag to figure out where we could stay. The sun was starting to set, and we kept being turned away from hostels and guest houses, it seemed that every guest house was all booked up.  I was starting to grasp the very real possibility that we might not have a place to stay overnight in this place.

Finally, when I was starting to get panicky, we stumbled upon a little family-run guest house down an alleyway. In the dark, we made our way into the property and inquired with the family. Success! They had 4 rooms to rent, 3 of which were already occupied. We got the last one in the nick of time! It was nighttime, so we couldn't appreciate the beauty of this off-the-beaten-trail guest house. We woke up the next morning to a rooster cock-a-doodle-dooing on the roof across from our room. The owner of the hostel made us a simple breakfast of bread, fresh fruit, and coffee. The bathroom was recently renovated (though no hot water) and the beds were large and clean. As we sat on our balcony soaking in the morning sun, we overlooked a fountain and lush gardens in the small plot of property below. It was a little piece of paradise.
Bottom Line: Simply Amazing!

Rating (out of 5)
Location: ★★★★★
Price :★ (we paid 350IDR per night = CAD$6.50)
Staff Friendliness:★★★★★
Security:★★★★★
Fun Meter:★★★

Keprabon Guest House
http://keprabon.wordpress.com/
Jl. Kajeng, Gg. Sunari No. 14A, Ubud 80571 Bali- Indonesia
Mobile: +62 81 337 08 8000
Phone: +62 361 970 566
E-mail: keprabon.guesthouse@gmail.com


Bangkok Hostel Recommendation: New Siam Guest House 2

In another swing through Bangkok I finally struck gold with accommodation: near Khao San Road, nice hotel, swimming pool, and air conditioning! I forget why we decided to stay here and not somewhere cheap, but it was a welcome sight. The bed was comfortable and freshly laundered, the shower was clean, and it was less than 5 minutes from Khao San Road, and 2 minutes from the water bus station.

Bottom Line: The hostel you go to when you want to spend a little extra to feel fancy

Rating (out of 5)
Location: ★★★★
Price :★★★★★
Staff Friendliness:★★
Security:★★★★
Fun Meter:★★

New Siam Guest House 2
50 Trok Rong Phai, Phra A-Thit Road, Chanasongkram,
Bangkok 10200, Thailand
Website: http://www.newsiam.net/ns/newsiam2.php
Tel: (66)0-2282-2795, 0-2629-0101

Bangkok Hostel Recommendation: Star Dome Inn

Entrance to Star Dome Inn

For those of you who thrive in the bustle and hustle of booze, parties, street vendors, ladyboys, and hordes of of other tourists looking to have just as much fun as you, head down to Khao San Road.

Star Dome Inn (website http://www.stardomegroup.com/) is located in the heart of Khao San Road backpackers district. It's a very basic hotel that has front desk staff 24/7, an internet cafe in the open air entrance, and an affordable menu for breakfast. It offers safe, basic, affordable rooms in the middle of the party. Downsides include noise and the not-so-clean feeling when you hang out in your room for too long.

Bottom Line: A place to keep your stuff. Who needs sleep anyways?
Star Dome Inn, Khao San Road, Bangkok

Rating (out of 5)
Location: ★★★★★
Price :★(cheap!)
Staff Friendliness:★★★
Security:★★★★
Fun Meter:★★★★★

Star Dome Inn
104/1 Soi Rambuttri, Jakaphong Rd.
Pranakorn, BKK 10200 Thailand
Email: info@stardomegroup.com
Tel: 02-6291136

Tuesday, November 8, 2011

Zidisha Inc: My First Experience With Microfinance

So last week I made my first microloan. Emphasis on the micro. It was only $25, but it's a start- right?

With all the excitement surrounding microfinance lately, I figured it was my turn to try it out. The big guys out there are Kiva or MyC4 that you might have heard about already. Zidisha Inc. is a fairly new organization, but has been described as 'the evolution of microfinance'. As I read more about the organizations out there, I came to support Zidisha even more for the work it's doing.

For starters: How does nonprofit Peer-to-Peer microfinance with Zidisha work?
  • Make an account on the website, and choose the amount you want to loan (via bank transfer or paypal)
  • Read through the list of borrowers that have applied for a loan
  • Choose who you want to loan to, and set the amount and interest rate for the loan (no higher than 6%). Click finish to send the money to them directly.
  • Sit back and relax! The borrower will repay you over time back into your Zidisha account, which you can choose to reinvest in other business owners, or take out as a lump sum payment.
A Zidisha Borrower showing off her business
Help out a small business owner and their family, AND get paid back in the end? I like this.

Why I like Zidisha better:
  • NO ONE who runs Zidisha gets paid. Even the founder is a volunteer. Low costs=more money to the people who need them
  • There is no institution acting as middleman (who usually will take a cut of the loans they distribute)
  • You can interact with the borrowers online: ask questions, leave comments, and give feedback about your borrowers. Borrowers will often post updates, send pictures, and let everyone know how they are doing. Very cool.
I'll try to blog about my experiences after I get repaid and reflect on my experiences as a lender once again. In the meantime, you should probably check out their website!

www.zidisha.org
www.twitter.com/zidishainc
www.facebook.com/zidishainc

Wednesday, October 26, 2011

Bangkok Hostel Recommendation: Smile Society

Owners Nid and Bee toured with us
After spending almost two weeks intermittently in Bangkok I was able to come out with two solid recommendations on where to stay. They all depend on what kind of Bangkok traveler you want to be:

Clean, Safe, Calm?
Smile Society Boutique Hostel @Silom Road
This brand new hostel has all the comforts of home: free computers, free breakfast, Foosball, books, in home movie theater, and hostel owners that treat you like family. To get to your room you have to pass through 3 levels of card scanning security. The dorms are made of spacious bunk beds, clean sheets, and large lockers to put your bags in. The shared single-sex bathrooms are clean and bright. This is a hostel that makes backpacking seem easy. Some might argue that the location is not prime. Smile Society is a 20 minute subway ride away from the famed hedonistic backpacking mecca Khao San Road. If being drunk every night isn't your thing, Smile Society is for you!

Bottom Line: The hostel your Mom wants you to stay at.
Sweet Dreams!

Rating (out of 5)
Location: ★★★★★
Price :★★★★
Staff Friendliness:★★★★★
Security:★★★★★
Fun Meter:★★★


Smile Society Boutique Hostel
Vaewsawon Hanbuntrong (Ms. Bee)
Smilethailand@gmail.com
130/3-4 Silom Soi 6, Silom Road
Bangkok 10500, Thailand

www.smilesocietyhostel.com


Not in the mood to stay sensible in Bangkok? Try staying here

Tuesday, October 25, 2011

Tough Mudder, Virginia 2011 Obstacles 17-24

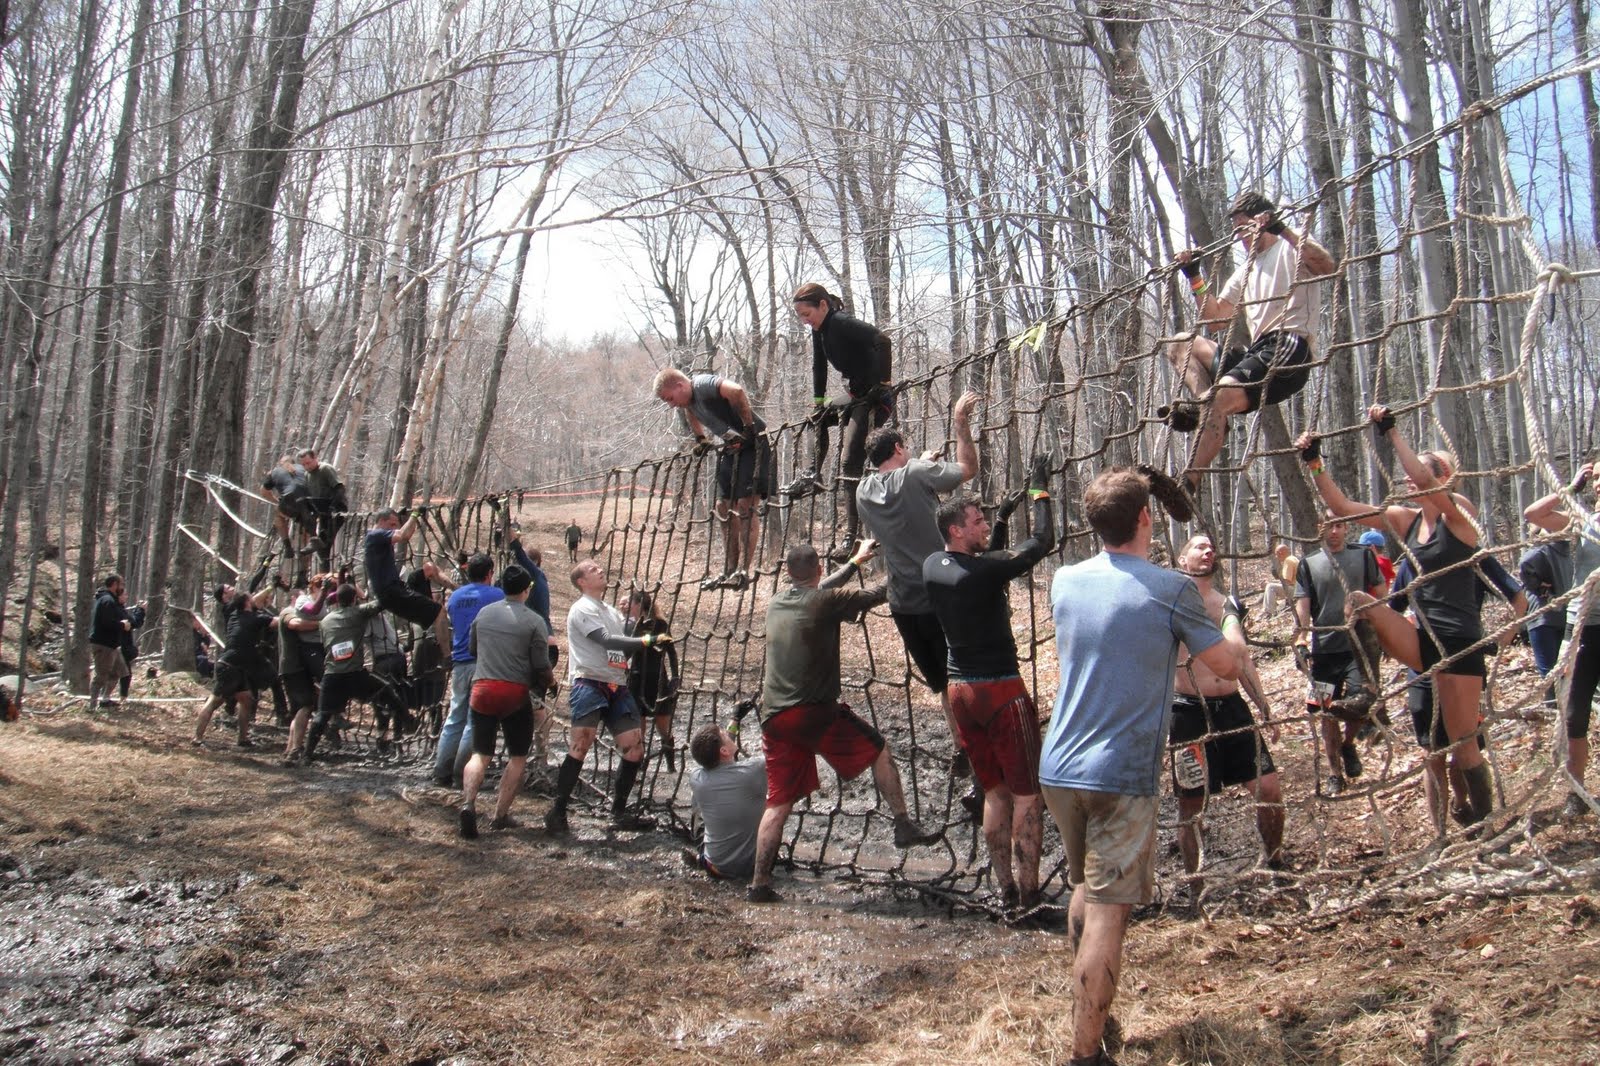
17. Spider's Web: This was not done at the top of the mountain like the official map says, but was actually done earlier in the race (right after the Chernobyl Jacuzzi). This challenge was to climb up and over the loose cargo net. People helped by pulling the net tight at the bottom, so there were a few cases of fingers being stepped on and mud falling into peoples eyes. Another obstacle in which gloves were essential.

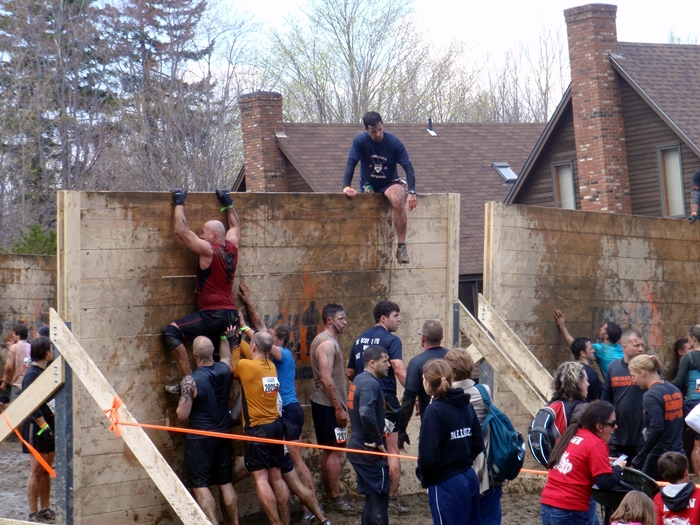
18. Berlin Walls #2: Similar to the walls at the beginning of the race, but about 5ft higher. This is the first time in the race that we experience a wait to get through the obstacle. I used the time to eat more bananas (as we passed another hydration station). In order to get over the walls, you needed to be hoisted basically above someones head and then pull yourself over. I saw one guy get dropped and land right on his tailbone. Looked painful.

19. Shake n' Bake: After another long run between stations we arrived at shake n' bake. This should fall under the category of cruel and unusual punishment. You have to walk thigh deep through water, then crawl under barbed wire through a sand pit. This ensures that all those little white pieces of sand get everywhere on your body, especially your legs and feet. On the plus side, it was a sunny day and the sand was sparkly, so I glittered for the rest of the race!

20. Mystery Obstacle: If I told you what this was I would ruin the mystery, right?! Just kidding. This obstacle played on fear of heights. We climbed up to the top of what looked to be the backside of a half pipe. Then you had to crawl in to a smoke filled space completely dark. The only exit was down the dark tube below you. Literally a 6ft drop before you curved down. Like a slide on steroids. It was much scarier than I thought it would be. To add insult to injury there was no cover once you emerged out the other end, so everyone who finished the obstacle hung back to watch the faces of those who had just taken the plunge. Pure fear. and sore tailbones.

21. Kinky Tunnels: Not difficult unless you had a fear of the dark or closed spaces. Crawl along the rocky ground along the twists and turns of a dark tunnel. More bleeding knees in the process. Another instance where my gloves came in handy.


22. Turd's Nest: Crawl across a big cargo net while a guy laughs and sprays you with a high pressure hose. Simple enough. I would say, the best strategy to get across this one is not to crawl but actually roll across. Less chance of having a limb slip through the net. And stay away from the guy with the hose.

23. Everest: By this point in the race we were totally hyped up. We knew we were nearing the end of the race and only had a few challenges left. Everest meant running up the side of a half pipe. A really tall half pipe. I saw a few people managed to pull themselves up on their own, but for the most part, you had to run at the ramp as fast as you could, then have someone grab you to help pull you up. If you fell, well, you hurt yourself. This obstacle had the largest crowd and longest wait. Probably because it was such a slow process to pull people up, and many people had to try a few times before they made it. Luckily it was sponsored by suchandsuch a company, who took a picture automatically as we ran up.

24. Fire Walker: This seemed like it would be a cool thing to do at the time, but was much less cool and pleasant than I thought it would be. you had to run maybe 30ft uphill through a maze of burning hay. You're already tired and panting, so we weren't moving too fast. Once you inhaled, the smoke grabbed you by the throat and choked you. It got in your eyes, and burned your nose and throat. If the path had been much longer I might have dropped from holding my breath too long. The fresh air on the other side was just in the nick of time.

25. Electroshock Therapy: Finally. The big obstacle right before the finish line that has everyone talking. Run through a jungle of live wires that snap you with 10,000volts of electricity. If you're lucky, you make it through with only a couple of shocks and keep running. If you're unlucky, you get zapped in the face, or the leg, or so hard that you drop immediately and lose control of your muscle. I got zapped three times in a row. The feeling is hard to describe. It is surprising, numbing, and painful. Your body does weird things. I found that after the third shock I stopped running and was glued to the spot (then got yelled at by the girl behind me who was getting cooked as well). Once guy got zapped right near the end, jumped, and belly flopped out of the end. But you finished and felt like you were king of the world. You finished the Tough Mudder!!!!!

Crossing the finish line was an amazing feeling. Our whole team finished together. We were given the orange headbands, Tough Mudder Tshirts, and a cold pint of beer. We were so pumped up we barely felt the swelling in our knees from hills, the scratches on our elbows from crawling through mud pits,  the aching muscles from climbing, the scratch in our throats from the smoke inhalation, or the seeping cold of autumn in Virginia. Nope, those feelings came later.. then the next day when we woke up, and even worse the day after that.

It was time to celebrate!!

Visit their website at http://toughmudder.com/

Tips:
  • Train for this event- They are not kidding when they say it's tough. The biggest surprise was the actual distance run. The hills were steep and we saw many people drop out because their calves seized up on the uphill.
  • Wear gloves/goggles: I bought some $3 work gloves from Home Depot. Fabric material with the fronts dipped in rubber. Useful for gripping and not cutting up your hands. I didn't have goggles but saw many people did.
  • Think outside the box: Monkey bars? Use your hands and feet. Steep up hill? Run backwards to save your calves. Steep down? Slide on your bum. Use your teammates and help others out. If an obstacle is too tough, think of another way to do it.
  • Don't wear bulky clothes: Things get wet very quickly in the race and it will only drag you down. The less weight, the better. No water bottles, fanny packs, backpacks, etc. Unless you are wearing a costume. In which case I commend you.
  • Bring warm clothes for after the race: that was our fault. It's autumn, and we left most of our warm clothes back in the car. You need to bundle up after the race and those little foil blankets only do so much!

Tough Mudder, Virginia 2011 Obstacles 9-16

9. Underwater Tunnels: Between the Chernobyl Jacuzzi and underwater tunnels I should note that we had an unmarked obstacle. Loose net was hung between two trees and you had to climb 15ft up one side and down the other. Then we arrived at underwater tunnels- another water challenge (aka hate it!). Jump into a pool and dunk your head under 5 logs covered in barbed wire. Jumping again into cold water was bad enough, but dunking myself 5 times again? Absolute anguish.


10. Greased Lightening: Slide down the hill on a tarp into a pool of muddy water. This was fun in theory. Unfortunately under the tarp were rocks, sticks, and bumps that you couldn't see until you hit them. Ryan went down head first and crunched his wrist pretty badly on a rock. I would recommend next time to take it slow and slide down on your bum. Unfortunately, even that hurt on the way down.


11. Boa Constrictor: These were small tubes you had to crawl through that submerged at the bottom. then you had to crawl out through cold, muddy water and back up into another tube. This obstacle reminded me why I bought gloves for the event. There were rocks at the bottom of the tubes! It worked on so many levels- pain, claustrophobia, fear of drowning, and my dislike for cold water. On to the next challenge!


12. Berlin Walls: This was a wall made of hay. In order to get over the walls, you needed run at it as fast as you could, to be hoisted up and then pull yourself over. There was a little bit of a wait for this challenge, but people generally helped each other and had good spirit. That is until we made it through the next challenge.

13. Death march. Ugh. this distance was looooooooong. They called it death march for a reason. This is the first part of the race where I felt the distance and started to really feel the burn. We ran up a hill, stopped at a water stand for a quick break and bananas. Then we continued to run more up hill until we got to the ridge of the mountain. It was in this stretch (probably the 5-6 mile mark) where we started to see people dropping out with muscle cramps or throwing up at the side of the trail.

14. Cliff Hanger: This was a relatively simple challenge. We had to continue up the hill to get to the ridge, but on the way up was a slippery muddy hill. Either you ran fast enough up the slope, or someone grabbed your hand to help you up. Once you made it, you kept running until the top of the mountain. This continued the long stretch of running through a golf course. Hey, at least it was flat!

15. Kiss of Mud: This crawling challenge was also not difficult. Throughout the day, people had worn several trenches through the mud under the barbed wire, so as long as you crawled as close as you could to the ground under the wire, you were okay. This challenge guaranteed bloody knees and muddy clothes. Also, getting caught on the barbed wire meant little holes in your clothes!


16. Log Jammin: Navigated ourselves over and under a series of logs, as dictated by more barbed wire fences. They made sure to fill the bottom with some sort of manure mud, so it was extra stinky as you crawled through the muck.


Click HERE for a rundown of obstacles 17-24, and advice for people who are running Tough Mudder!

Tough Mudder, Virginia 2011 Obstacles 1-8

1. Braveheart Challenge: This was the kickoff from the start line. Immediately we were pelted by water from the machine that, in the winter, would be used to blow snow over the hill. Hundreds of us rounded the corner and hit the first real challenge- a ski slope. This was effective at thinning out the crowd; some folks chose to run, I chose to walk. Don't let that intimidate you. After this first hill I never saw anyone run up another hill for the next 9 miles! At the top of the hill we had to climb over 10ft walls. It was possible to do alone, but most people needed a little lift.

2. Devil's Beard: This challenge was not difficult in itself. What was a challenge was the route to get there. Once we got to the top of the ski hill we ran fully down to the bottom of another. At the bottom we ran through mud, and had to run along raised hay bales while being sprayed by water, before going back up another ski hill. It was on the upward slope of this hill that we arrived, panting, at a net slung loosely on the ground that you had to crawl under. Luckily I had gloves on so I just dragged myself through. After that we had to finish going up the hill.. oh, then back down the hill towards the next challenge.

3.  The Gauntlet: A water challenge. Because we were the last heat of the day, the ground was absolutely soaked as we ran through getting hosed off. I had mentally decided early on that I was going to try to keep my shoes dry as long as I could; this challenge certainly ruined that! But hey, that's what Tough Mudder is all about!


4. Hold your Wood: Just like the name says, there was a large log pile that had to be transported. Some were huge and had to be carried by 2 or 3 people. I chose a small log that I could carry on my shoulder. You had to walk up a ski hill with it, then loop back around and walk down the ski hill with it and drop it off back at the wood pile. Not too difficult, but awkward to carry the logs for such a long distance.


5. Twinkle Toes: You needed to be light on your feet to get across this one! Boards about 20ft long and 4inches wide were placed on their sides across a pool of murky brown water. The whole thing was put together with plywood stages and rocked quite heavily if anyone on an adjacent board fell. Luckily I held my balance and made it across. Not everyone on my team was so lucky!

6. Funky Monkey: Monkey bars over a dirty pool of water that are on a slope. Oh, and the bars rotate in their holds. If you fall you get a cold shock. Up until this point I actually hadn't been submerged in water yet, like some of my team mates had. Ryan went first- made it. Meg went second- she fell in halfway through. Dave went third- he fell 3 bars from the end. It was my turn. I knew my spindly little biceps wouldn't be able to hold me, so I took a different approach. I held on with my arms AND legs, and crawled across the bars upside down. Success!! (Hint- Do that)

7. Log Bog Jog: This was described as being through a swamp, but it really led uphill through a wooded area. We had to cross over fallen trees (or crawl under them) This wasn't a tough challenge, just another uphill run to get to the next location.

8. Chernobyl Jacuzzi: This was, hands down, the WORST challenge of the race. Others disagreed, but this was a shock to my body I wasn't ready for. Picture this: Dumpsters, filled with wacky colored water, then filled with 2 feet of icecubes floating on the surface. Then they put a board covered with barbed wire in the middle of it. You have to jump in to the chest deep ice water, THEN willingly dunk your head under the board to get to the other side to get out. As soon as I jumped in, my muscles contracted, my lungs refused to breathe, and I basically could not move. Panicked, I tried to get under the board, but because there was so much ice I found it hard to submerge myself, or stay under water.Then I didn't have enough muscle control to pull myself out so my teammates had to. My skin was numb for about a minute after. It felt like I was being punched by a million tiny ice fists. BRRRRR!!!

So that's the first third of the race. Click HERE to read about obstacles 9-16!

Tough Mudder 2011

On October 22, 2011 I ran one of the toughest races I have ever done.

Tough Mudder!!!

According to them:
"Tough Mudder is not your average lame-ass mud run or spirit-crushing ‘endurance’ road race. Our 10 mile obstacle courses are designed by British Special Forces to test all around strength, stamina, mental grit, and camaraderie. Forget finish times. Simply completing a Tough Mudder is a badge of honor. "
So at 6:30am Saturday morning we all climbed into the car to drive 3 hours from Washington, DC to Wintergreen, Virginia; a steep, mountainous ski resort for the site of the race.

We weren't in the best of shape, but we were jacked up on caffeine and excitement. When we arrived at the parking lot to take the bus up the hill to the start line, the atmosphere was buzzing with anticipation.  Painted faces, spandex costumes, and spontaneous hyped up yells of excitement filled the crew jammed in to each school bus that delivered us to the sign in desk.

We signed a death waiver, registered our names, and received our bib and race band. We were the last group to go at 12:20, so we milled around the start line while we waited for each group ahead of us to go at 20 minute intervals. Around us, the morning finishers were drinking beer, participating in the keg toss, warming up around the fire, and congratulating each other with their tell-tale orange headbands they got at the finish line.

Soon it was our turn to start. On your marks, Get set, GO!

Click HERE to read about obstacles 1-8


Our team ready to rock!

Friday, October 21, 2011

I'm Baaack!

I'm back to blogging! It's been 2 months.

I've slept in 18 different cities. Endured a lot of rain.

I've met monkeys, tigers, elephants, and snakes.

I've made 4 border crossings overland; fought a Thai man at one.

I've eaten stinky durian, salty crickets, and sweet sugar cane.. plus many things that are probably better left unknown.

I've spoken with survivors of genocide, former child soldiers, and small business owners working to support their families.

I got certified to SCUBA dive down to 100ft, joined a trapeze school in Thailand, and drove a moto to the top of a mountain.

I've made friends from all over the world.

Done things I never thought I would do.

But the adventure doesn't end there!

Sunday, August 14, 2011

Off on a New Adventure!

Time for SE Asia 2011. Click on the picture for my route. Here we go!!!!

Tuesday, August 2, 2011

Ultimate Tournament- The Great Gwangju Uprising: Battle for Jeolla

Gwangju is the pink bit
For my last weekend in Seoul, I was fortunate to have timed it right for a final ultimate tournament in the South West of Korea. Gwangju took almost 4 hours to get to by bus, through the rice paddies and mountains along the coast. Gwangju is most famous for the 1980 Gwangju massacre, in which hundreds of Korean students were killed by army forces suppressing a pro-democracy demonstration. It remains the forefront of the democracy movement in Korea, and has a thriving youth population. We played at the beautiful Chonnam University fields.
This was a hat tournament, which means that each individual signed up and then was randomly assigned to form teams. New players had the chance to learn more about the sport, and experienced players got to mix up the roster for a bit. 

The groups were well matched and the games were fun. The weather also managed to hold off on raining for most of the weekend! 

It was great fun spent with great people. I'm going to miss playing ultimate frisbee in Korea!!